Review change requests
The peer review feature is a very popular extension to Git, supported by most of the repository hubs. It allows collaboration on changes made by a user so they can be reviewed and approved by another user before being merged into a target branch.
Important: to be able to list and review change requests, you first need to connect to your repository hub.
Note: the naming conventions differ slightly between repository hub providers. GitHub, for example, uses the terminology pull requests, whereas GitLab uses merge requests. Both refer to the same concept. Hackolade Studio takes into account the specific terminology of the hub provider. However, in this documentation, we abstract them and refer to the more generic "change requests".
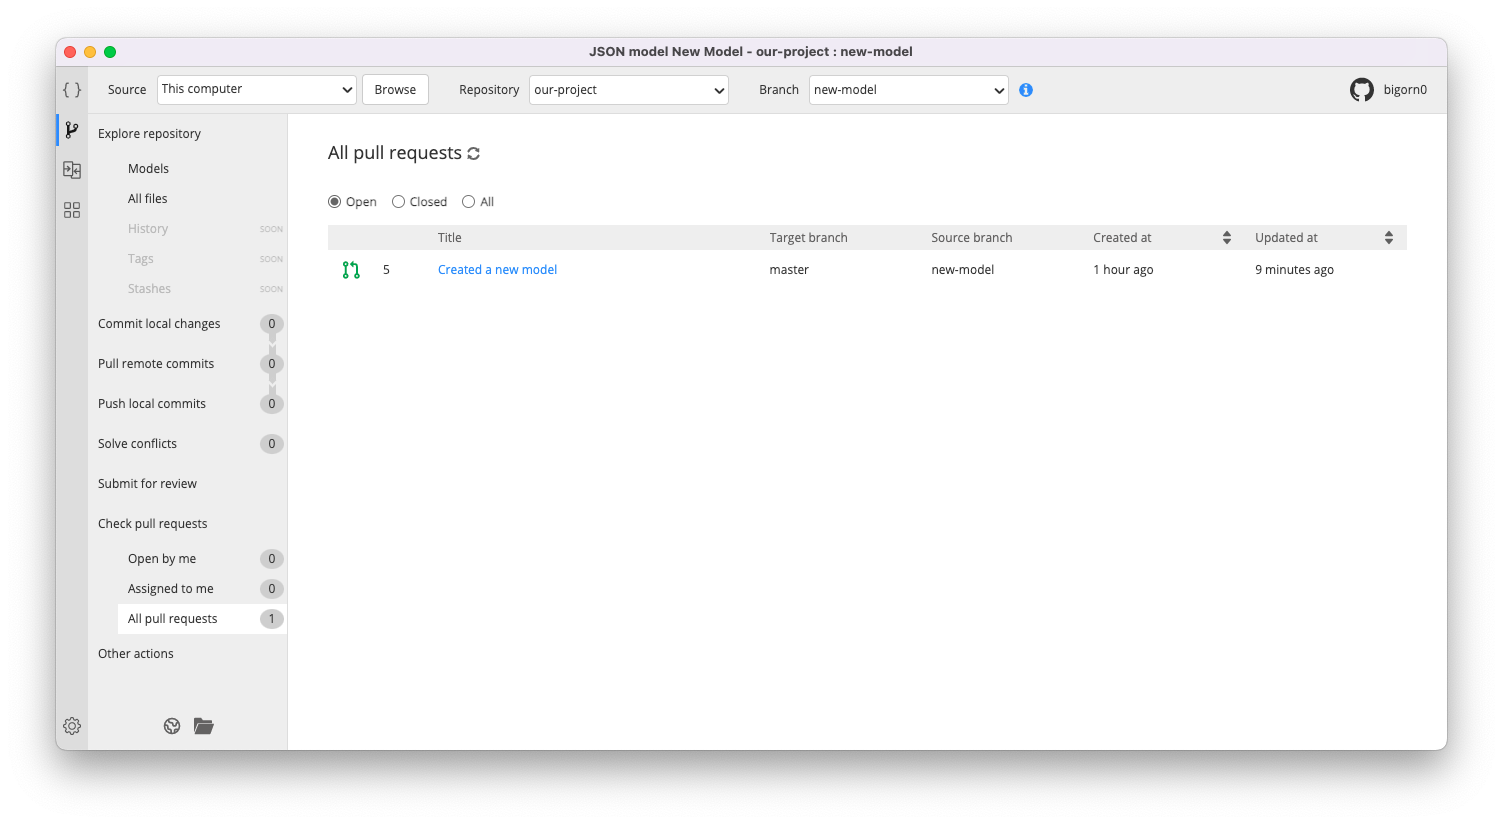
In the repository context, click on the left menu item "All pull requests" to see the list of change requests currently open for the active repository. The buttons at the top of the table allow to display only the open change requests (by default), only the closed ones, or all of them.
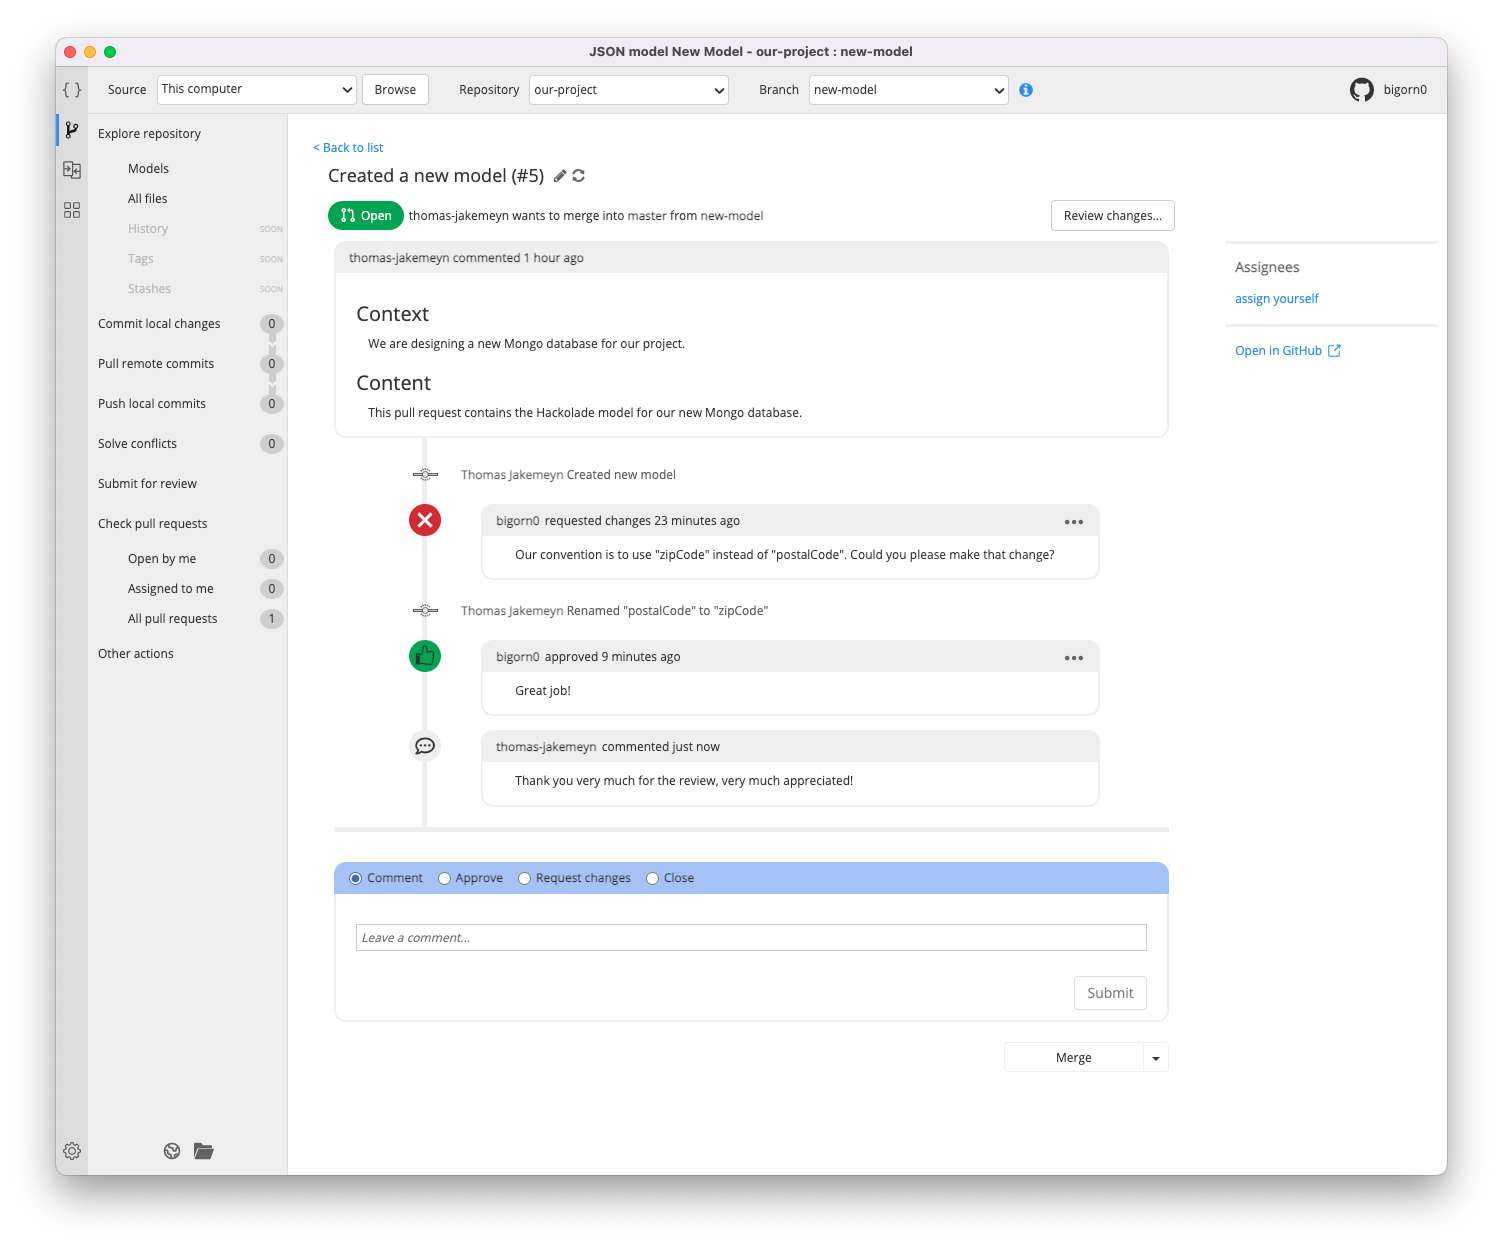
Click on the title of a change request to get the detail screen:

-
the title of the change request is typically a short description of the changes;
-
a pen icon next to the title allows editing the details of the change request, aka its title and description;
-
a refresh icon next to the title allows to fetch the latest updates from the repository hub, if newt commits and comments have been made since displaying the page;
-
the status of the change request is rendered below the title.
-
"Open":
- when a change request is created;
- when a change request is rejected with some comments to be addressed by the author, its status remains "Open" and does not transition to a different status.
-
"Merged": when a change request is approved and merged;
-
"Closed": when a change request is rejected and definitely closed without being merged;
-
-
the author of the change request is displayed, as well as the target branch and the source branch.
-
the main component of this detail page is the timeline. It starts by the description of the change request. It then renders every commit and every comment sorted by chronological order.
Besides displaying a lot of information about the change request, this detail screen also offers multiple actions that are documented below.
Review submitted change requests
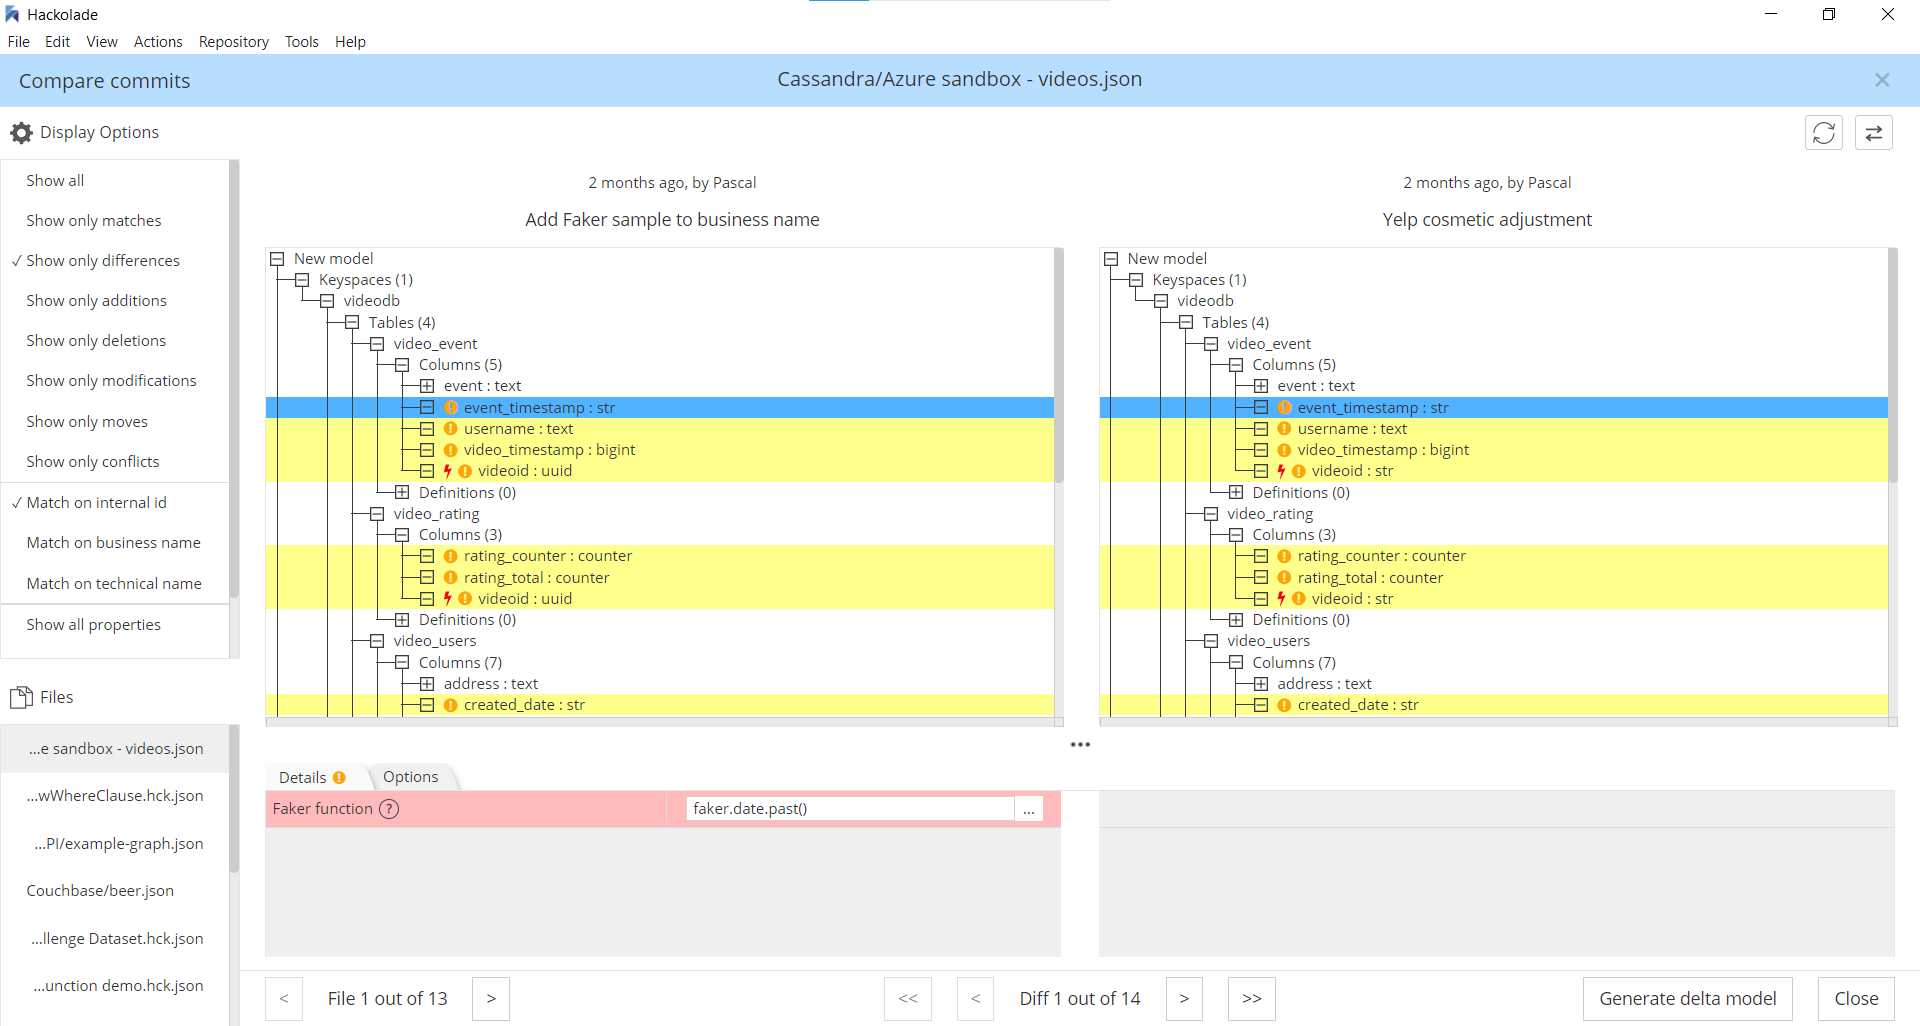
You can review the changes that are included in a change request by clicking on "Review changes...".

Hackolade Studio shows graphically what has been modified in a data model using its compare view. This helps you understand every single change, and decide whether or not it is legitimate. This is much friendlier than complex text diff screens used by developers.
Leave a comment
It is possible to post comments without soliciting adjustments, approving the change request, or closing it.

- select "Comment";
- provide a comment (mandatory);
- click on the "Submit" button.
Solicit an adjustment
If reviewers are not satisfied with the change request, they can solicit adjustments from the author.
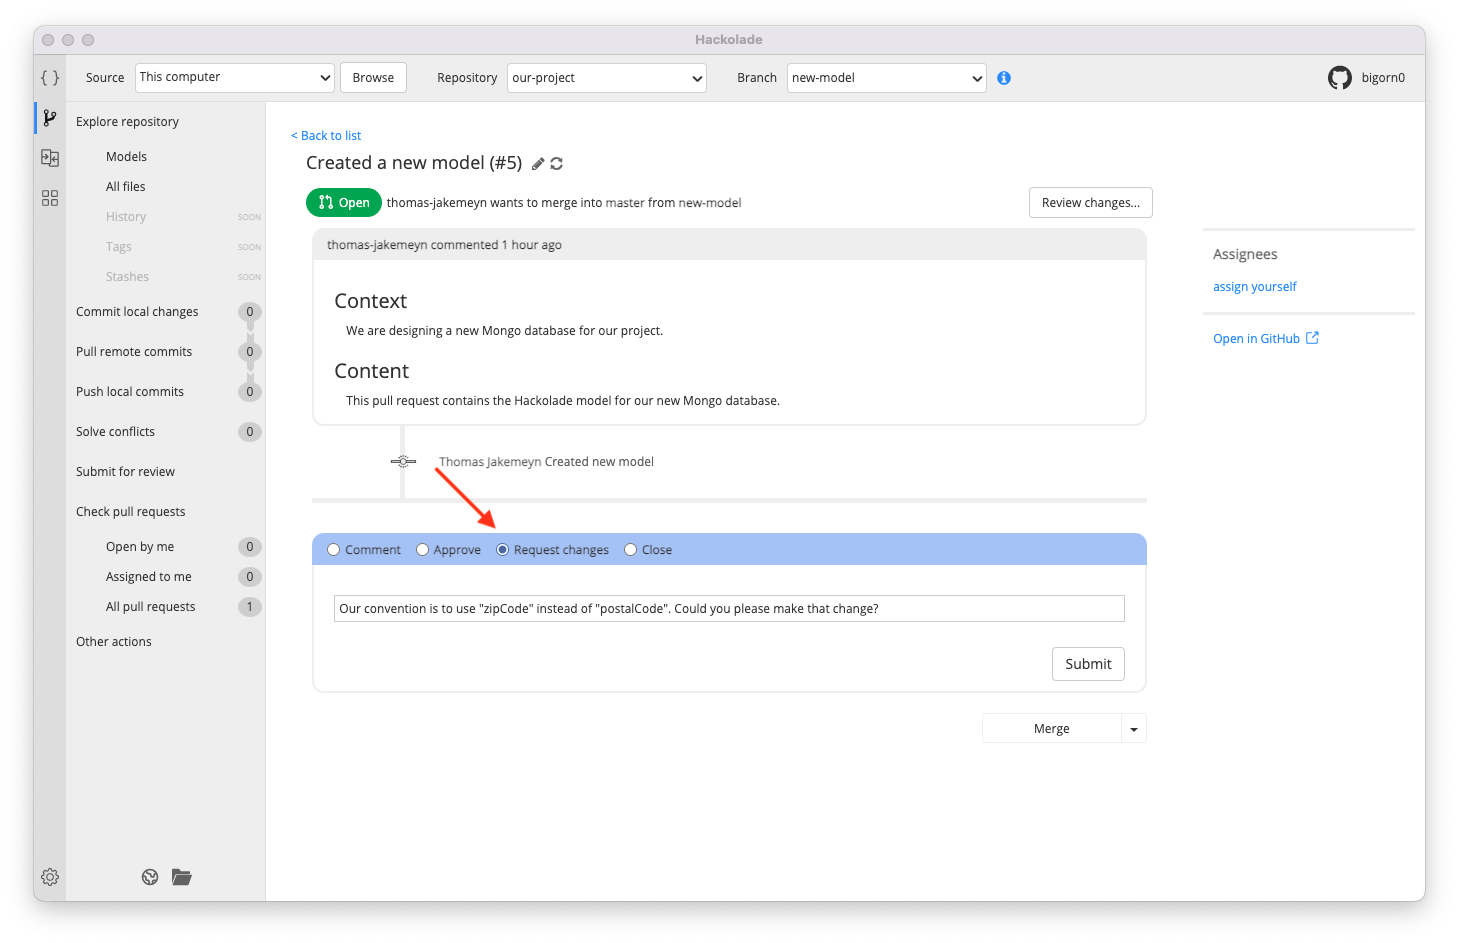
- select "solicit adjustment";
- provide your feedback (mandatory);
- click on the "Submit" button.
This gives the author of the change request the opportunity to process the reviewer's feedback and make adjustments if necessary. The author just needs to make the adjustments solicited in the same branch, commit them, and push them. The adjustments will be automatically included in the change request and made available to the reviewer, displayed following a timeline.
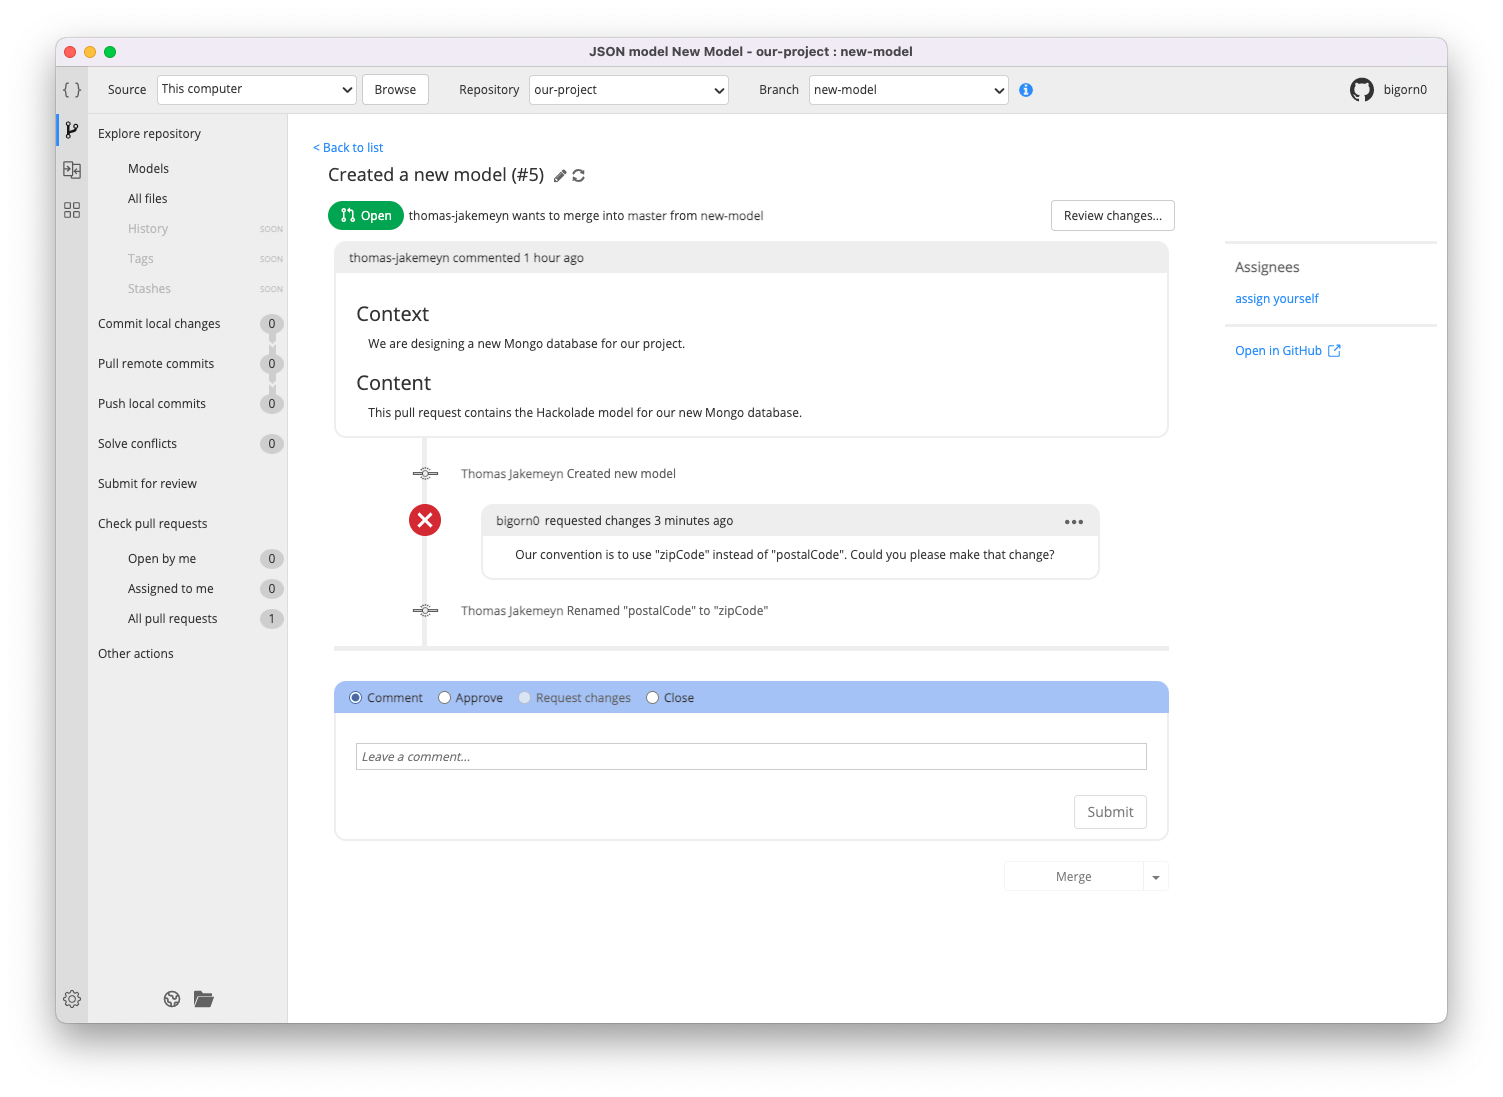
Approve a change request
Once the reviewer is satisfied with the full change request, including adjustments if any, the change request can be approved.
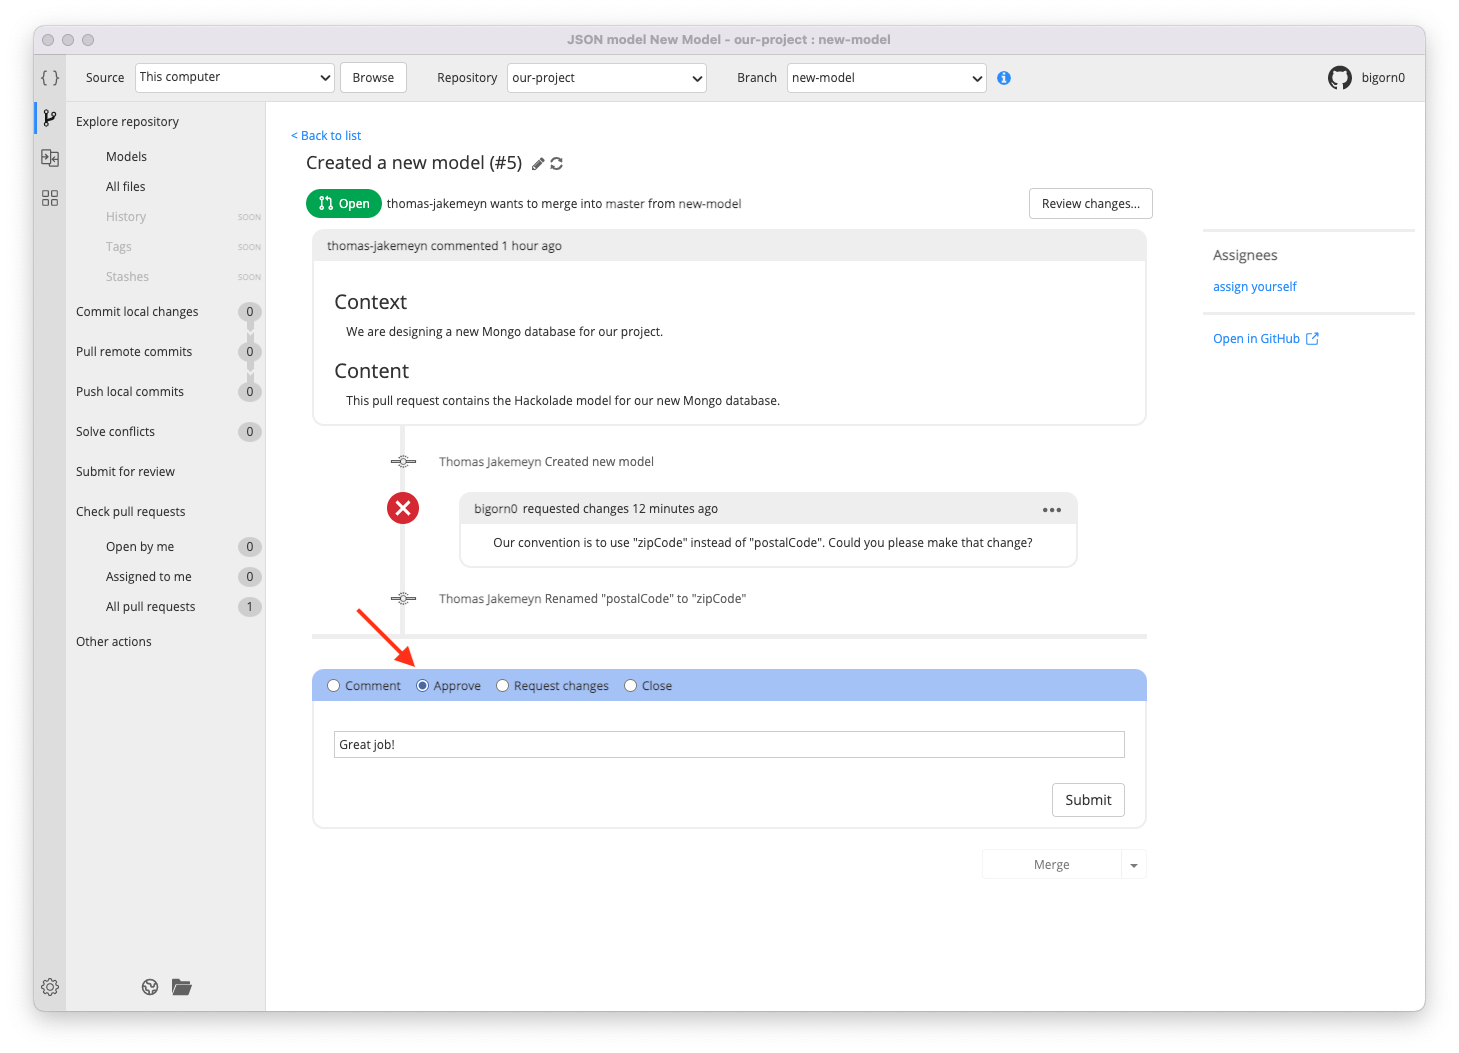
- select "Approve";
- provide a comment (optional);
- click on the "Submit" button.
Note: you cannot approve your own change requests.
Important: approving a change request does not merge it into the target branch. The merge itself is a separate action. In the screen below, the change request is still open although it has been approved. This gives the opportunity to other reviewers to provide additional feedback.

Update a change request
A change request is about requesting that a source branch gets merged into a target branch that has been protected by some merge pre-conditions, such as peer review(s) or status check(s).
When you open a change request, other changes may get merged into the target branch, and cause your source branch to become out of sync with the target branch. Updating your source branch with the latest changes from the target branch can help catch problems prior to merging your change request. As an example, it helps detect and solve merge conflicts.
If Hackolade Studio detects that the source branch is out-of-sync with the target branch when (re-)loading the details of a change request, then an Update button is displayed above the Merge button. Clicking on the update button will sync the target branch with the latest upstream changes. If any conflict is detected during the update, the Solve Conflicts action will be made available to solve them and finalize the update.

Once the target branch is in sync, the Merge button is made available.
Merge a change request
Once a change request has been approved, it can be merged. Although merging a change request is typically done by the person who reviewed it, it can be done by other users as well, including the author of the change request.

There are 3 different merge strategies available through the drop-down button.
- Merge creates a merge commit that joins the source branch and the target branch together.

- Squash and Merge creates one single new commit that encompasses all commits from the source branch.

- Rebase rewrites the history on top of the target branch.

Your organization can provide guidelines about which merge method to favor, depending on the situation. It can also configure a remote repository to enforce the use of a specific method for merging change requests.
The advantage of using Merge is that it preserves the full history. On the other hand, the target branch keeps an extraneous merge commit every time you need to incorporate changes. This is not only true when merging a change request into a target branch, but also vice-versa, every time you update your own branch with new commits from the target branch. On very active projects, this can quickly pollute the history and make it harder to understand this history.
Using Squash and Merge is especially interesting when merging a branch that contains a lot of commits. However, these commits will not be available on the target branch, as they will be squashed into one single commit. This means that you cannot later port some commits to another branch, unless you have kept the original source branch around. It is basically all or nothing. Also, using Squash and Merge is not suited for regularly aligning branches, as it does not create any link between these branches.
Using Rebase creates a clean, linear history that is easy to understand, while preserving individual commits. However, it needs to rewrite the history, creating brand new commits from the original ones. This frequently leads to the need to perform repetitive actions (like fixing the same conflicts again and again), or risky operations (like force push). Rebasing does not play well with change requests.
We favor the use of Merge, as it is the safest method. On very active projects, you may prefer using Squash and Merge for merging change requests.
Close a change request (without merging it)
If the reviewer (or the author) doesn't want a change request to be merged, it can be closed. The changes that it contains will not be integrated into the target branch.

- select "Close";
- provide a comment (optional);
- click on the "Submit" button.

Assign yourself to a change request
Generally, reviewers do not need to assign themselves to a request in order to review it. But there might be a desire to be notified of any adjustment, feedback and comment made to the request, or just so to see it in the list "Assigned to me".
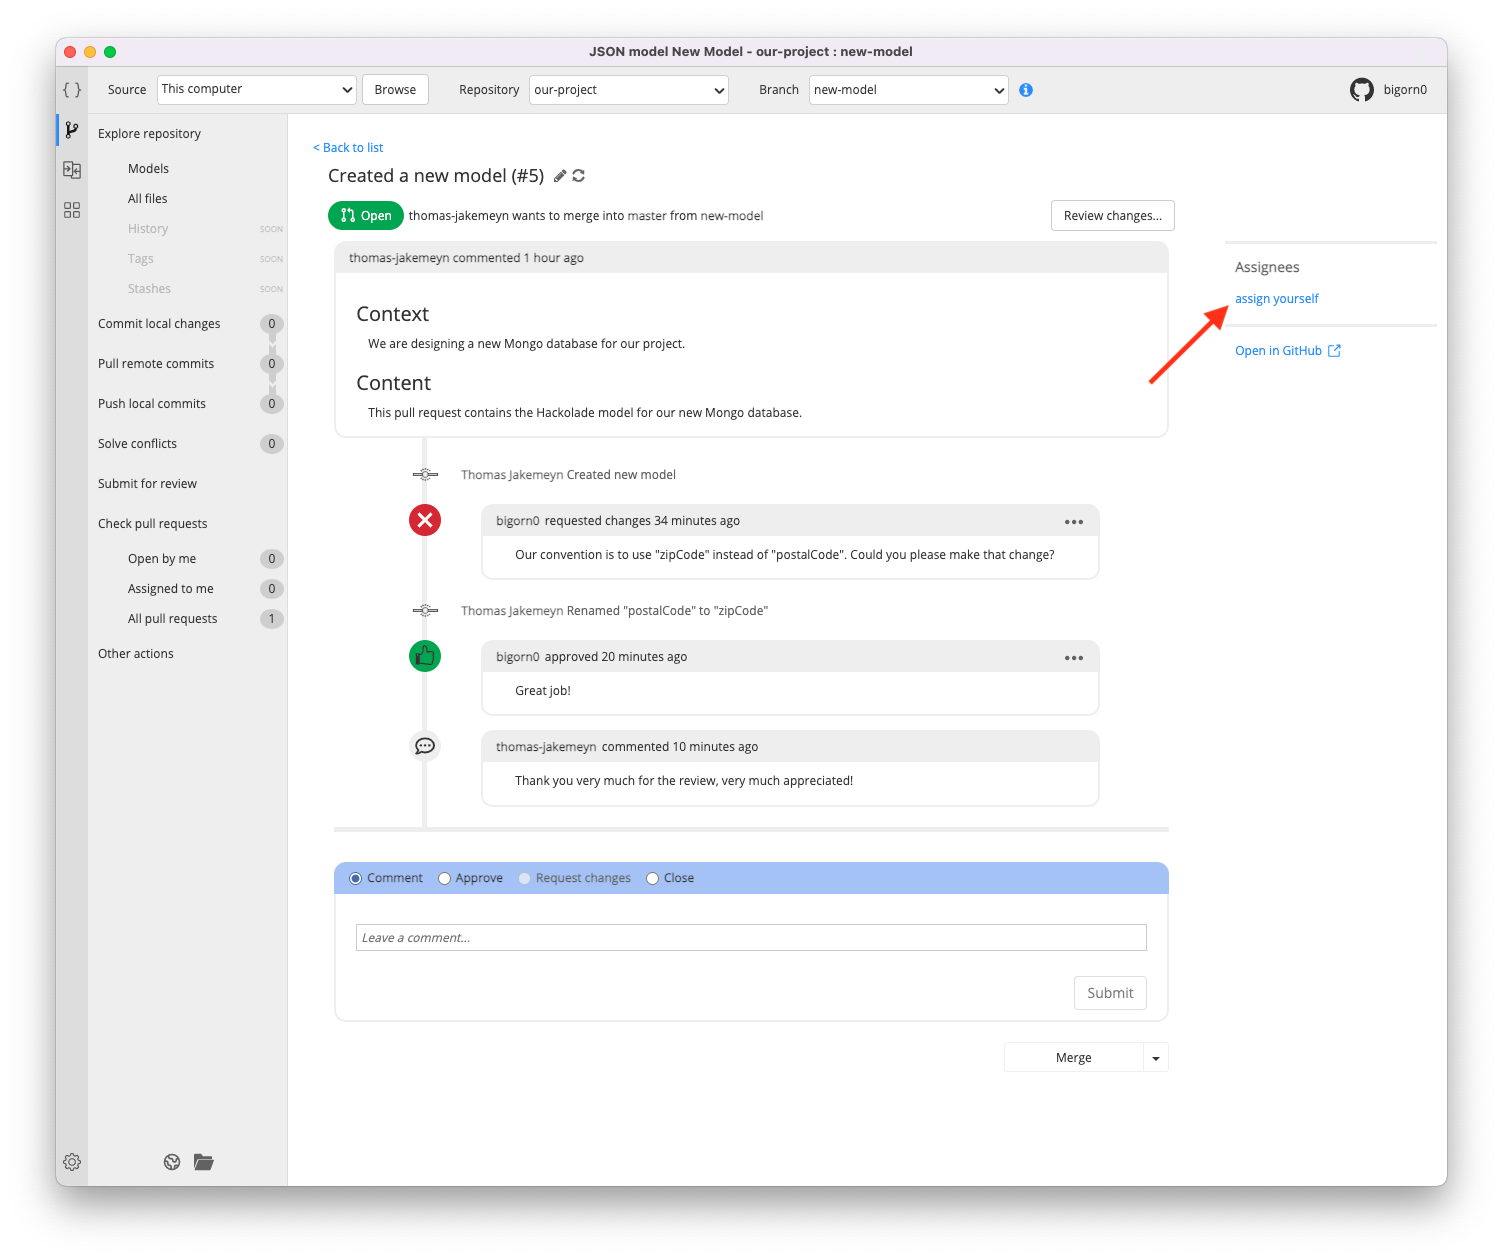
You can access the list of change requests that are assigned to you from the left menu, through Check pull requests > Assigned to me.
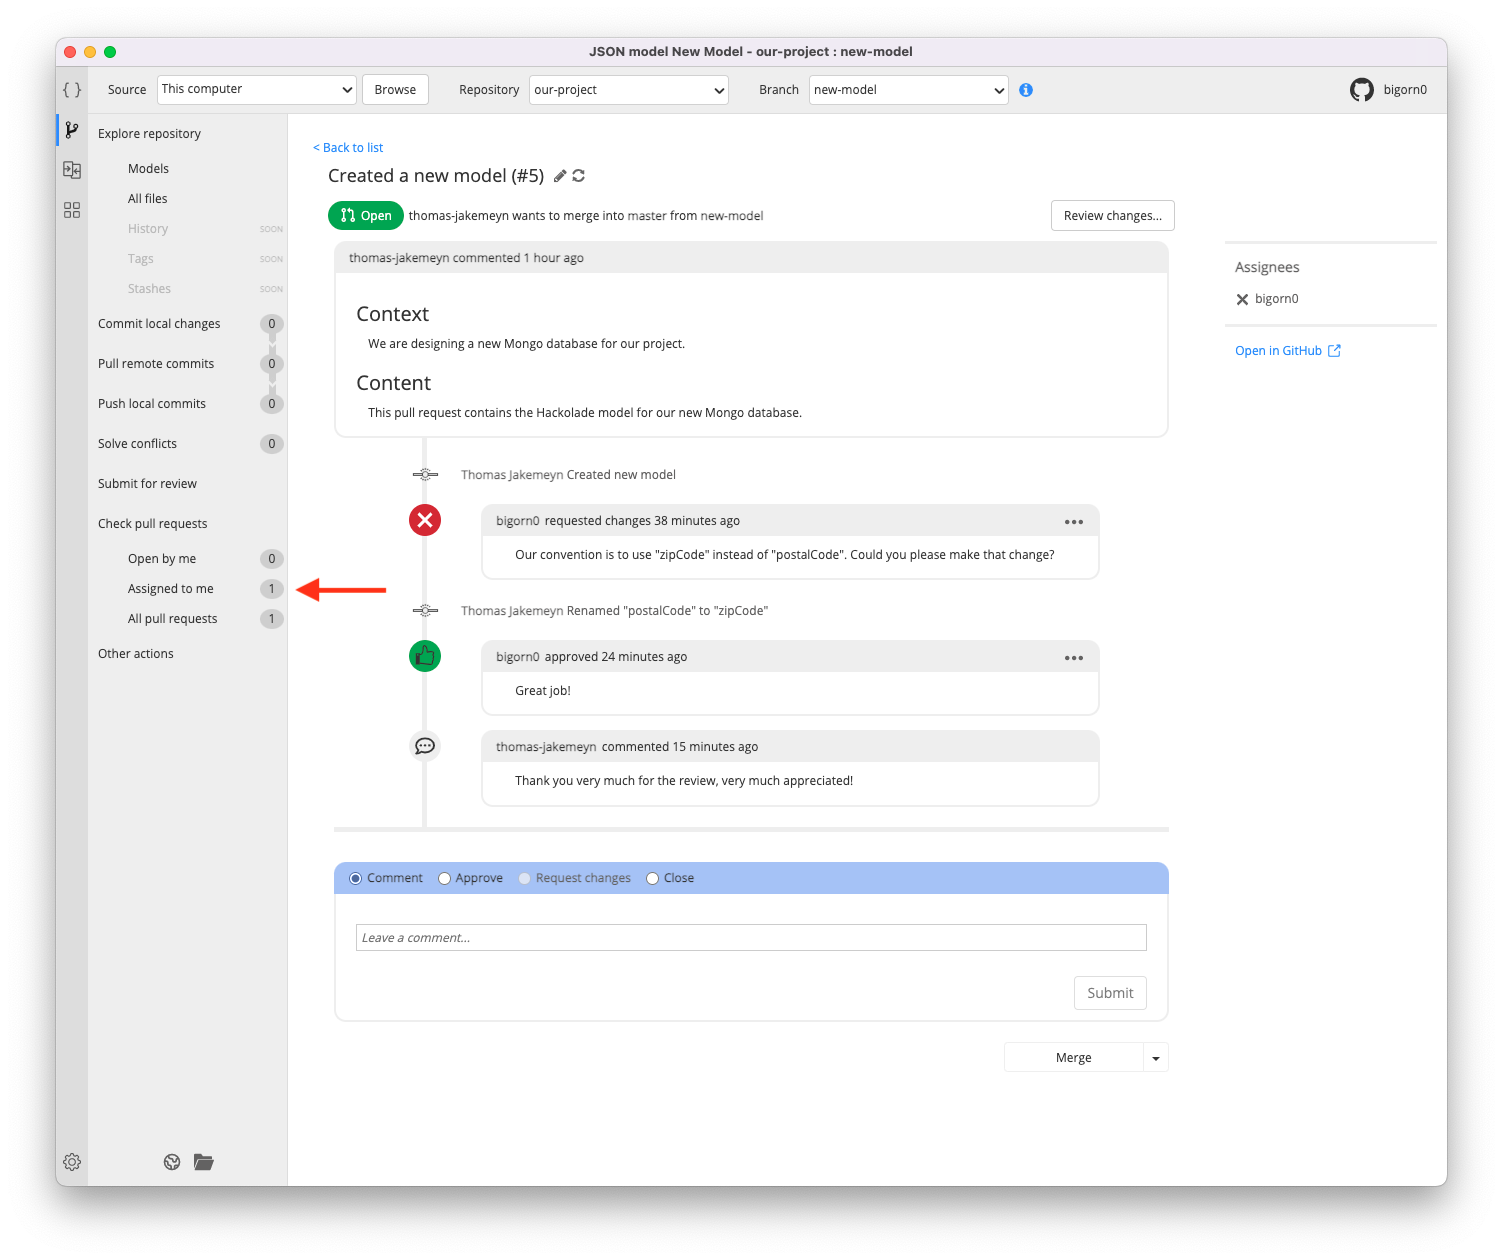
You can unassign yourself from a change request by clicking on the cross icon next to your name in the list of assignees.